1.What is a Clone? and 2. Why do I need one?
1. A Clone is a Bootable copy of your Systems Drive i.e. the one that contains your operating system and programmes/applications in a configuration that works.
You can of course boot from the install DVD that came with your machine but it will have the original version of the OS not the latest you were last using neither will it have any files you have saved on to the System Drive Disk or any of the updates or Applications you have since installed.
2. Systems Recovery Insurance - If the System Drive on your computer fails or it becomes unworkable after upgrading or installing a Programme / Application, you can get working again as quickly as possible.
How do I create a Clone ?
A Clone is not the same as a backup (we will deal with them later), it's a Bootable copy of your System drive.
So if the information on your drive gets corrupted you can Boot from the external Clone and keep working or Clone it back to rebuild the internal*.
If the internal drive fails, you can still use your computer using the Clone, or if there are other problems as well that make your computer unworkable you can use the Clone with a similar computer until you get yours repaired.
Two basic requirements
1. A Drive on which to put the Clone -
It can be internal but suggest you use an external drive.
There are three basic requirements for the external drive:
A. It needs to use a format that the computer recognises I use external drives with eSATA, FW800/400 or USB connections, USB3 is ok (5Gb/s Max) it's faster than eSATA If you are buying cables USB 3. is also called USB3 Gen1 and USB 3.1 (5Gb/s Max). The latest USB3 Gen 2 cables are faster at speeds up to 10Gb/s the cable may have the Nº 10 embosed above USB symbol
But you are unlikley to see any speed improvement due to mamimum speed of SATA drive is in the region of 3 - 5Gb/s
NB. When using my MBP I cannot boot using the eSATA-Express 34 connection however USB and FW work.
B. The Clone needs to be on its own drive or a Partition.
C. The drive or partition needs to be larger than the drive you are cloning.
Creating the Drive
I decided to use a 1TB Ruggedised external with eSATA and USB 3 connections mainly because I have one that I take with me when away from the studio you can see it by clicking LINK
Any good quality external drive would do 1TB ones are relatively inexpensive.
As a Bootable Clone needs to be on its own Drive with no other files, it would be wasteful to put a 200GB Clone on a 500GB or 1TB Disk so I created two virtual drives on this one physical drive, this is easy to do using the Disk Utility on your Mac go to:
Applications / Utilities / Disk Utility

and follow the instructions if you have never used Disk Utility I will add instructions shortly on a separate link.
You will note from the information below that whilst it's marketed as a 1TB drive you only have in the region of 930GB available the rest is allocated to disc management.
The system drive on my MBP laptop is 200GB so to keep things tidy I decide to set up two partitions on the drive the first one will be my working drive which I name 'LaCie1a' and allocate 700GB leaving 231GB for the second Partition which I name 'MBP-Clone'
You can change the Drive names later if you wish.**
I set up the drive I will be using most as my first partition as this area is on the outside of the disc and reads/writes faster, the Clone will only be used infrequently so can sit on the inside.
Partitioning is a way of creating in this case two virtual hard drives on one physical drive.
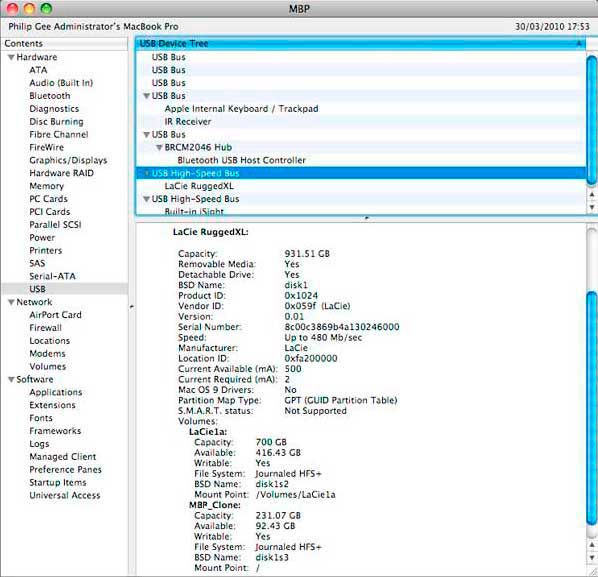
When you connect this Portable Hard Drive to your computer it will show up not as one hard drive but as two i.e. 'LaCie1a' and 'MBP-Clone' but they are actually on the same physical drive unplug it and you loose both.
2. The Software to create the Clone
I use: 'SuperDuper' from ShirtPocket - LINK
A Clone is easy to make with the SuperDuper application just follow the instructions.
Just specify the drive to contain the Clone in this case the one named 'MBP_Clone' it will then format the drive and copy all files on your System Drive and make it Bootable, it will also ask if you want to restart from the Clone when finished so you can check it's working ok I tend not to check this option.
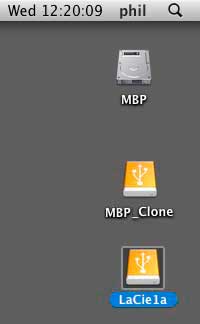
I prefer to verify it works by switching the computer off and disconnect all drives and label with a permanent marker pen the Bootable Clone then have a coffee. When refreshed make sure the bootable drive is connected and powered if necessary, switch the computer on and hold down the Option (alt) key and you will see a graphic of the available drives on your machine as the system drive has not failed you should see the System Drive and the Clone you have just made.
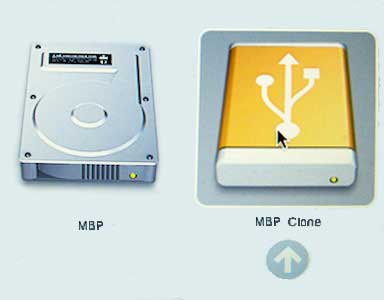
The above image shows, the internal drive 'MBP' on the left and on the right the Clone with the USB symbol, which I named 'MBP_Clone' this clone is on the partition I created on a 1TB LaCie external drive using 'Drive utility' (look under Utilities in Applications)
This still leaves me 700GB on a second partition that looks like another Hard drive it won't show up at this stage as the second partition is not a Bootable Drive.
To select and mount the drive move your cursor over the drive icon, click to select and double click to start.
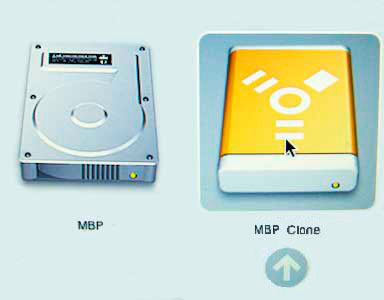
If you are using a Fire Wire Drive this is the symbol you see in this case it happens to be a 500GB Ruggedised Drive :
You can see that the computer is running on the external by clicking the apple symbol top left of toolbar and selecting 'About This Mac'.
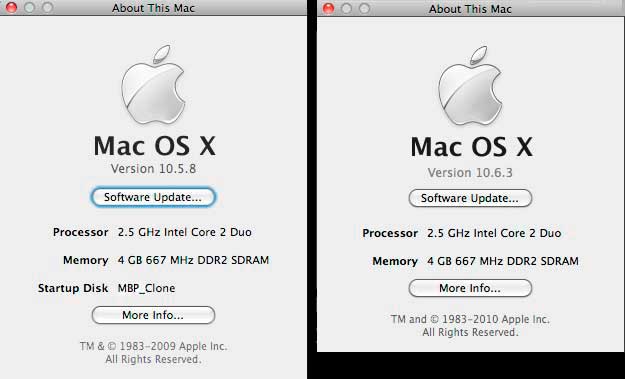
The left hand image is a screen shot of the information showing the Startup Disk as 'MBP_Clone' which you can see has an OS X v 10.5.8 Leopard operating system. On the right is an image is what you expect to get if it is running on the internal system disk in this case the latest updated Snow leopard OS X v 10.6.3. I installed on the 30th March 2010
NB. .
when I am happy with the performance of the latest system upgrade I will update my clone to this system.
*
Making a clone has one other advantage that the software builds the files on the Clone contiguously so it puts all the bits of files together rather than leaving them scatted all over the drive as you will find on the original. Whilst the Mac OS does defrag' on the fly there is still some defragmentation that Cloning tidies up.
Also if you have applied a lot of updates and new applications it's often useful to create a Clone and then clone it back onto your System Drive to tidy it up, this often results in an improvement in operating speed but make sure you are happy everything is working ok before you do, or keep a separate Clone of the pre-update System Drive.
**
To ensure all programmes run as normal from the Clone you will need to change the name of the cloned drive to that of the old drive it is replacing in this case just remove the '_Clone' so it reads 'MBP' this will ensure programmes that need to find information on a drive called 'MBP' can do so.